接口文档
文档格式
接口文档采用 swagger 导入 apifox. 不需要我们编写接口文档,只需要在编写 proto 文件的时候写好注释,运行 autocode 就会自动生成接口文档。
编写 proto 添加好注释
- 每个
message的上面写好当前message含义 - 每个
message里面的每个字段的后面写上字段含义 - 每个
rpc方法的上面写好当前接口的名称
after_rpc.proto
syntax = "proto3";

package hello;

option go_package = "gitlab.galaxy-immi.com/Backend-group/proto/pb/hello";

import "google/api/annotations.proto";

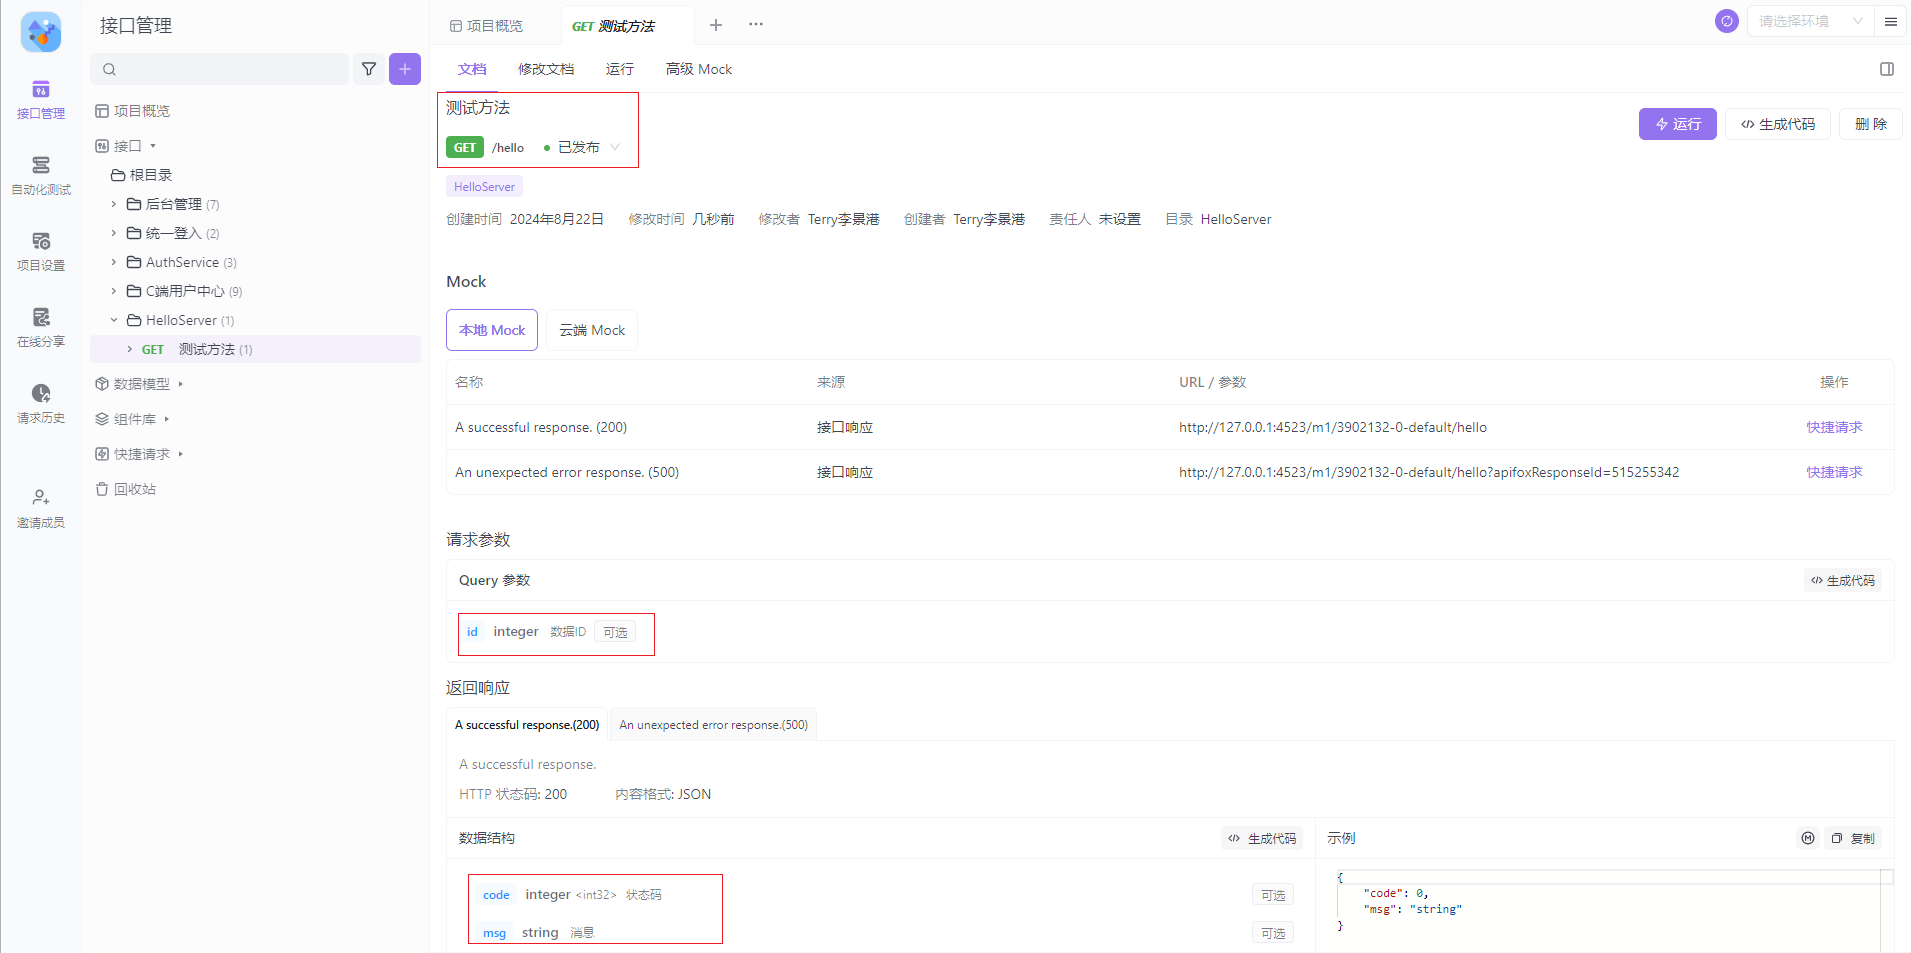
// HelloRequest 请求体
message HelloRequest {
  int32 id = 1; // 数据ID
}

// HelloResponse 应答体
message HelloResponse {
  int32 code = 1; // 状态码
  string msg = 2; // 消息
}

service HelloServer {
  // 测试方法
  rpc Hello (HelloRequest) returns (HelloResponse) {
    option(google.api.http) = {
      get: "/hello"
    };
  }
}
生成项目所需的文件
warning
执行命令前需要切到 proto/src 目录下,并且在proto目录下保证有 app, pb, swagger 三个目录,目录不存在需要人工创建。
PS D:\proto\src> autocode proto hello\*.proto
New config client
libprotoc 24.4
protoc-gen-app.exe have been installed.
protoc-gen-go.exe have been installed.
protoc-gen-validate.exe have been installed.
protoc-gen-grpc-gateway.exe have been installed.
protoc-gen-openapiv2.exe have been installed.
protoc-gen-go-grpc.exe have been installed.
current pwd:  D:\projects\yh\proto\src
Inject tags directory:  ..\pb
2024-08-21T20:16:29.163+0800    INFO    called on nil broadcaster
inject tags success
找到上面说的swagger目录的对应swagger文件
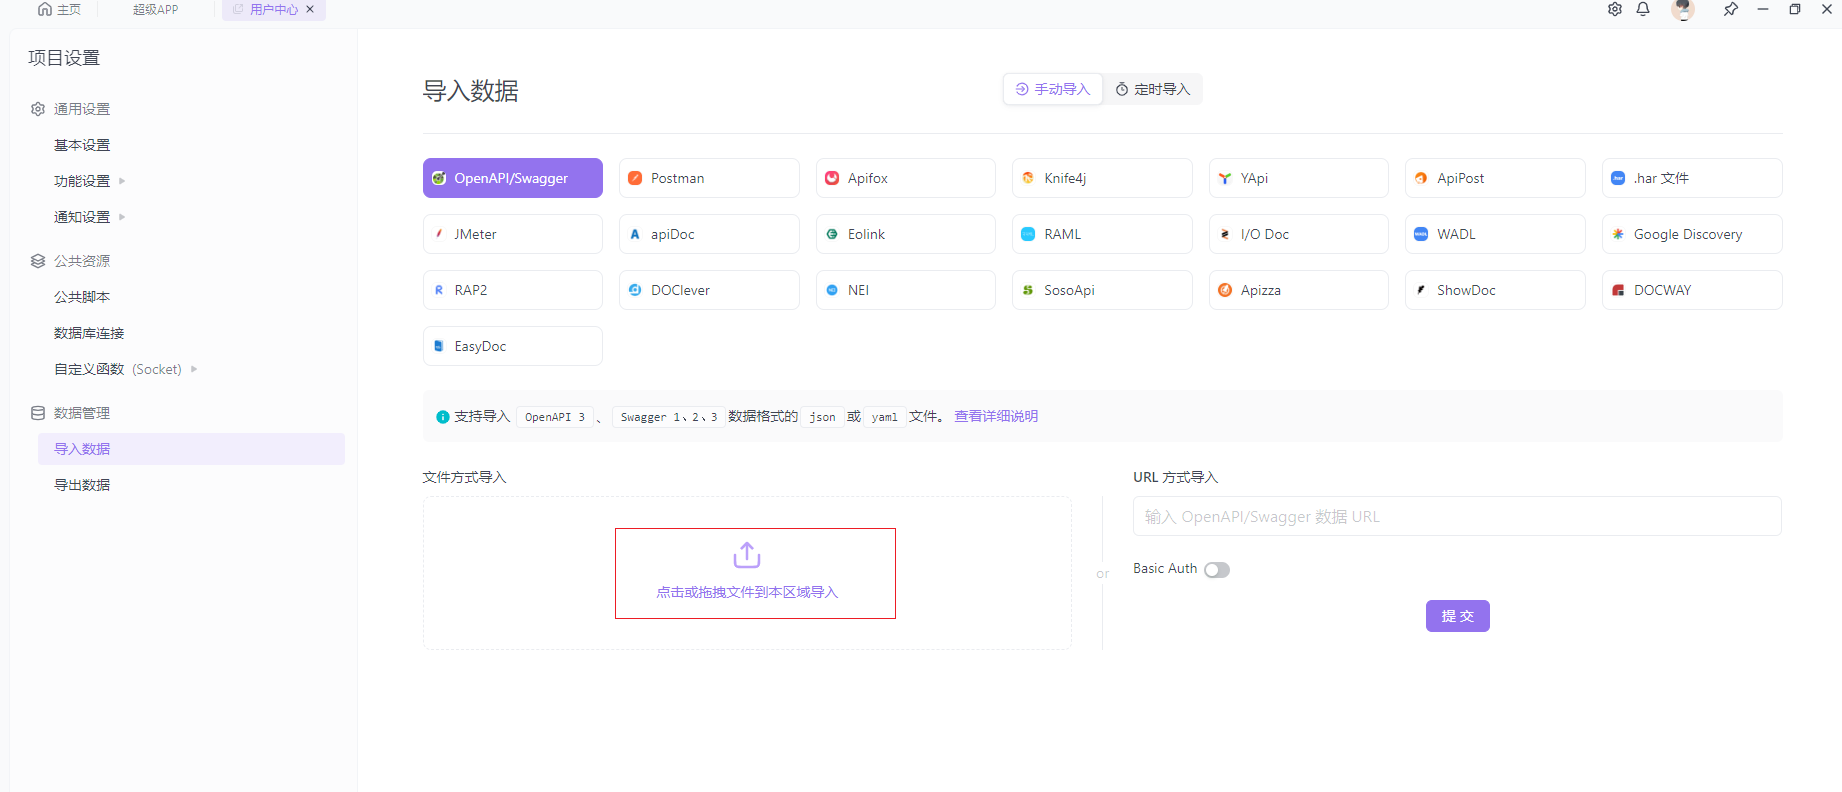
拖动这个文件到 apifox 的上传区域:

返回 apifox 的接口管理就可以看到对应的接口以及对应的参数信息:
